Showing posts with label signage. Show all posts
Monday, November 5, 2012
Thanksgiving Decor
Into the box goes the Halloween decor, and to my Holiday Pinterest board I go. Once again, I wanted something easy since we still live in an apartment, and I don't have that much room to work with. The following caught my eye......
Image via ADiamondInTheStuff
Image via ChooseToThrive
After Halloween, I'd had my fill of pumpkins, so I chose to go with the bottle idea. Keeping in mind I would need six bottles and six letters of some sort since I liked the simple "THANKS", off to Hobby Lobby I went.
After wandering around for a few minutes, I finally decided on a clear wine bottle to hold the wheat stalks. The hardest part was deciding on the lettering. I had anticipated that I would end up stenciling the letters on, but after visiting the ON SALE(!!!!) Halloween decor, I found these vinyl adhesive letters. It was a hard choice between the pre-made letters and the glass marker, but eventually I came to my senses and spent the extra $2 on the vinyl letters. The marker was cheaper, but 1. when would I ever need a glass marker again? and 2. did I really want to spend however long it would take to stencil the letters on in the hopes of me not coloring outsides the lines and making it look like a child did it? The answer to both questions was no, I would never need a glass marker, and yes I wanted it to look nice.
Along with two bunches of wheat stalks, the total was about $35. I probably could have saved about $10 on the bottles if I had waited for the bottles to be 50% off (since we all know Hobby Lobby runs its stuff on sale every other week!), but I was ready to do this project this weekend and I didn't want to wait. After spreading out my loot on the table, and a mere five minutes later, I had six bottles that spelled out THANKS.
It was pretty simple I must say. I lined up the bottles and added the wheat, but something was still missing. After revisiting my Pinterest inspiration above, I realized what I was missing. Burlap! (duh)
And with that, I was done! Even Michael said it looks nice, and that is definitely a win in my books.
Friday, July 6, 2012
Window Chalkboard
I know, I know, I have a million signs. Whatevs, I’m going to have one more. Our guests are going to be very well informed. Believe it or not, this one was the most interesting (i.e. last minute) sign out of all of them.
I had procured this window at Canton for a mere $5, thus deeming it the Best Buy out of all my wedding crap. That’s right, I’m calling it my wedding crap. I honestly didn’t know what I was going to do with it, but for $5, I couldn’t pass it up.
After a few months, I started thinking I could use it as the drink menu. I thought it would look really cute leaning against our drink bar, and it would serve to let our guests know what their beverage options would be. It conveniently has 3 panes, so I figured one for sodas, one for beer, and one for wine.
I have decided to leave its main function as a drink menu, but instead of using glass chalk to write directly on the window pane, I am going to turn it into a chalkboard sign. I’m still not really sure why I decided to add this last minute diy, but I have. So here it goes.
Monday night, I spent an hour covering the wood frame in masking tape, so that when I spray the chalk spray paint, only the glass will be affected. I also chose to use my brain, and left a few of the ends doubled over, so that the tape can be easily removed at the end of the project.
Last night, I sprayed the glass in a few coats of chalkboard spray paint, letting it dry between coats to make it look even.
And of course, it couldn’t be that easy, so on the 4th of July I had to add a few extra coats because you could still see thru the window in some spots that weren’t covered heavily enough by the spray paint. After letting it dry some more, I finally was able to rip up the doubled over edges and remove the tape revealing a window chalkboard drink sign!
Honestly, one of my easiest projects yet. Nothing had to be re-engineered, re-cut, or frustratingly cried over. Success!
Wednesday, July 4, 2012
Framing a P
Somehow, very unintentional on my part, our new monogram has become very prevalent throughout the wedding decor.
Courtesy WeddingChicks
It was originally used in our invitation “packaging” to include our wedding website:
It was added to the utensil tags with a little “Thank You” shout out under it (which I also used on the hostess gifts):
I am still trying to figure out how to incorporate it into our favors, but that’s for a later post. For another project, we had the monogram screen printed on white material, with the monogram being approximately 16x20 inches in size. We had asked for two, but were given three because one was considered a “test”. Luckily for me, I can’t tell the difference between the three of them, so score! Free one! And I knew immediately what I wanted to use it for.
Of course I have no pictures of any of the following (world’s worst picture taker, right here!). I had managed to snag this great white and gold heirloom frame for $20 on one of my scavenger hunts, and I also had some quarter inch Styrofoam board just lying around, which is scary. (We have a lot of things just “lying around” nowadays, and I can’t wait to throw it all away! It’s starting to feel like an episode of Hoarders.) Anyways, back on topic. We measured and cut the Styrofoam board to fit the opening, laid the P face down on our coffee table, centered the foam board on the back of the P, and then glued the loose edges of the material onto the back of the board with mod podge.
The trickiest part was (1) making sure the monogram was centered on the board and (2) not fighting with each other while trying to make the board fit in the frame. You see, I had measured the board a little bigger then the frame opening after a previous project was cut too small. So, when the board didn’t quite fit into the frame on the first try, we had a difference of opinions on how to make it fit. ANYWAYS, without getting too far into it, above is the great looking finished product and we’re talking to each other again J
We’re going to put the framed P behind the cake on the cake table to distract from this framed quilt our venue has hung on the wall. It was kind of a last minute diy, but I love the way it turned out, and the fact that it’s going to cover up (at least partially) that awful, doesn’t match anything, quilt, makes it look even better in my eyes.
Winning!
Friday, May 4, 2012
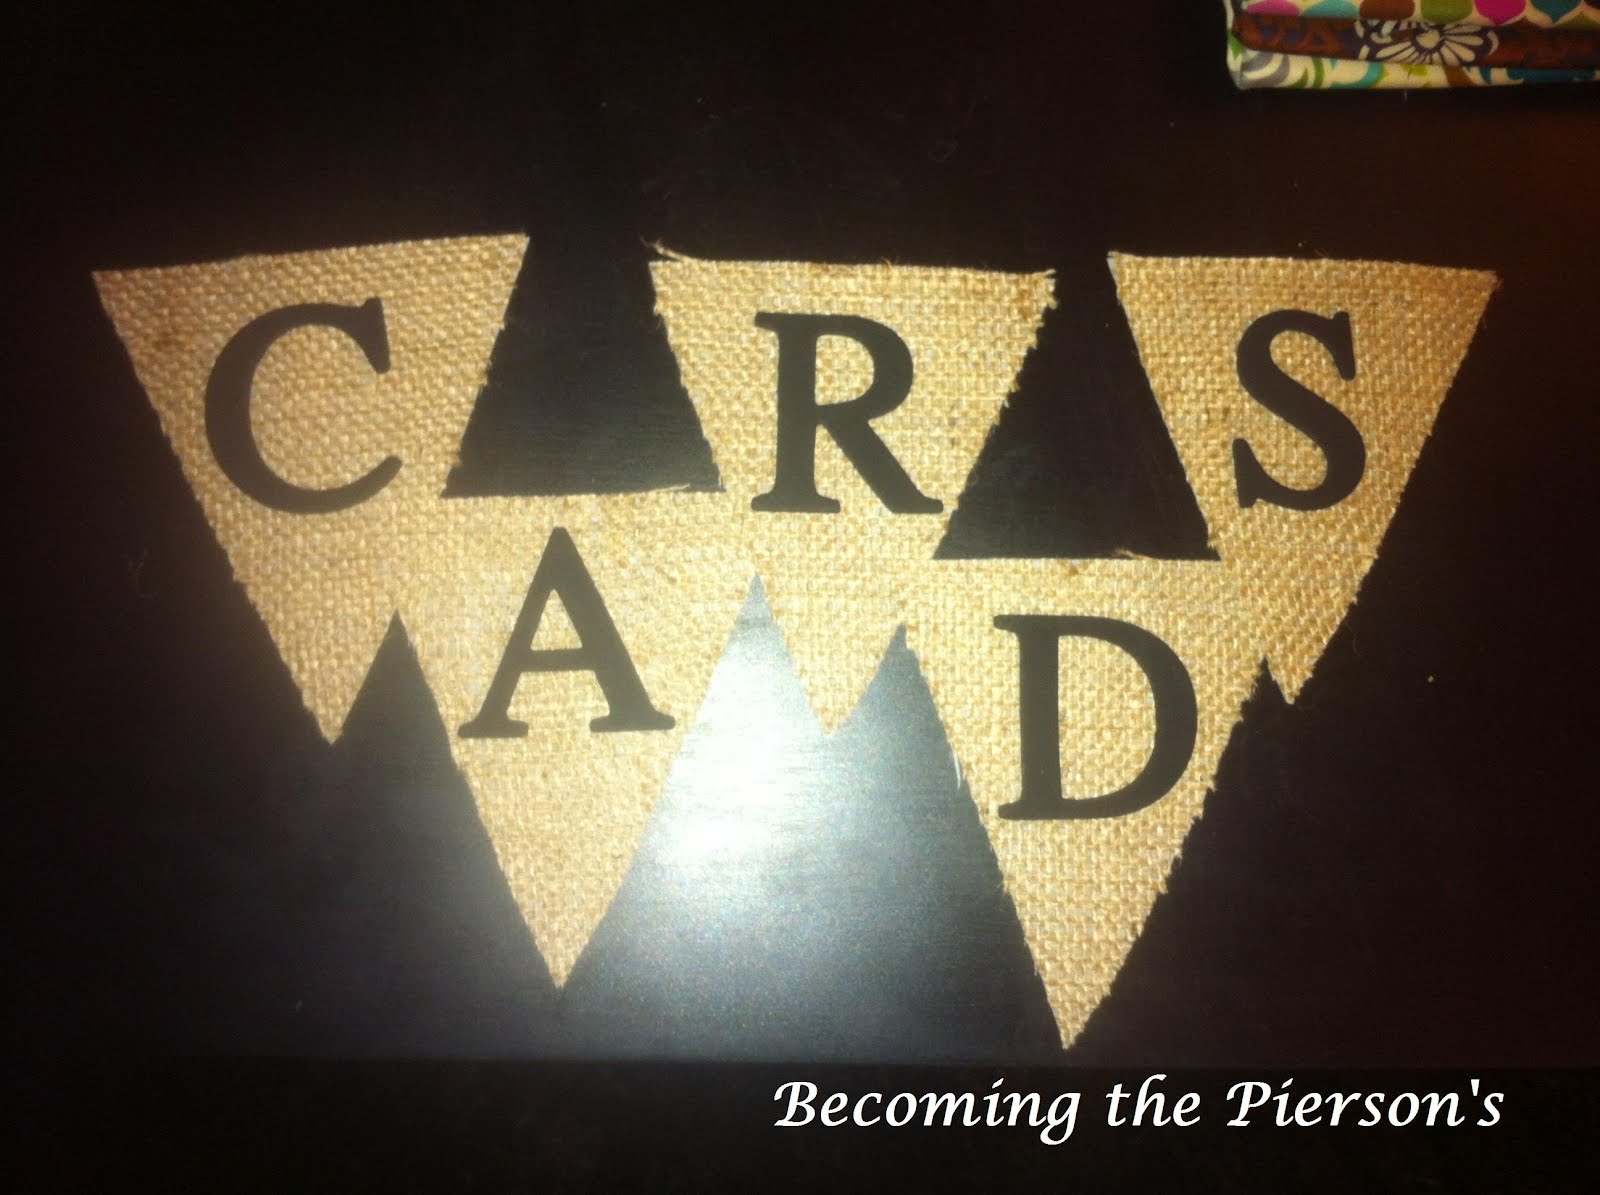
Burlap CARDS Sign
The other day I showed you my new card holder with the sign I made:
I think I’m going to go with the banner clothes pinned to twine instead of clipped directly to the basket. It gives it a little more flare.
I’m not really sure where this great idea came from, other then my brain must have stolen the burlap pennants from this picture….
Image via Etsy / Seller BellasBunting
..…and fused it with my love for these tiny clothespins!
Image via Etsy / Seller SoPurdyCreations
I wanted to share with you just how easy it was to do.
Your Supplies:
Burlap
Pellon
wooden letters
whatever color paint you want
paint brush
Tacky Glue
triangle stencil cut to the size you want
First, I infused the burlap with pellon. In layman’s terms (for those non-crafters out there), I ironed my burlap to my pellon. Burlap is a very flimsy fabric to work with; infusing it with the pellon makes it thicker and stronger. The pellon comes with directions as far as which side to iron to the fabric, so don’t worry. And just an FYI, pellon can be bought at craft stores or most Wal-Marts that have a fabric department.
Next, I traced the triangle 5 times onto the pellon side. Even though I have an abundance of that messy material these days, I traced the triangles in the below pattern to conserve fabric. After that, I cut the triangles out.
Personal Picture
In the mean time, I had painted my wooden letters black. I let the letters set for an hour or so to dry after the first coat, and then painted them with a second coat.
Finally, I used tacky glue to stick the letters to the triangles. I generously applied a strip of the glue on to the backside of each letter, centered the letter in the middle of the pennant, and pressed firmly.
Ta Da! A burlap pennant CARDS sign. Easy as pie.
Monday, April 30, 2012
Kicking Ass and Taking Names
I’m so proud of myself! I totally kicked our wedding’s butt this weekend! I have been feeling really antsy lately about not checking anything off my to do list, so on Friday (that’s right, I do wedding stuff at work, I’m not ashamed just don’t tell my boss), I came up with a list of things that needed to be done, and went to work Saturday morning. I was only distracted Saturday mid afternoon by a trip to the pool.
I managed to print and punch out 200 Thank You tags for our napkins.
On Sunday I was able to start tying them up in cute little bundles. These will be set next to every plate with a fork and knife in the middle.
On Sunday I made a mad dash to Michael’s and was able to finally snag the last few supplies that I would need for our picture display.
I had been working on my brooch bouquet all week. After a failed attempt at construction last Sunday, and a few more attempts mid week, Saturday night I was finally (FINALLY!), able to finish my brooch bouquet by wrapping the handle in twine.
Sneak Peak!
Finishing my bouquet also motivated me to wrap up my projects with these dang brooches, so I finished our brooch cake topper as well! Love it!
There were a few other little things I worked on as well. I mailed the last 5 invites that I had been missing addresses for and I delegated finishing the guest sign in book as well as finding the ties to Michael, so I don’t have to worry about those to do items! Whoop for delegating!
Why this mad dash all of a sudden when there is still two and a half months to go you might ask? Well, I started looking at the calendar, and realized that I have very few weekends left where I will actually be at home. I had this weekend, and I only have about 2 more before I‘m out of town every weekend following that. Hopefully I can finish the rest this coming weekend, but it’s going to be a nail biter folks! So stay tuned!
Think I accomplished a lot this weekend? I’m still on the fence about it :/
Saturday, April 14, 2012
Chalkboard Signs
As you can tell from my posts, the DIY's are starting to add up. Not money wise, because we're saving tons there (I promise, babe!), but all the stuff is starting to literally pile up in our second bedroom. I haven't even told you about the burlap table runners, bridal brooch bouquet, and our picture display. These are all diy's that have either been finished, or are in the process of being finished by yours truly.
But today, I want to address Michael's next question (Oh, that man is just full of questions these days), “Megan, how are our people going to know to write their name on the label?” And yes, we still refer to our guests as “our people”. Are we really the only ones that do this? I digress.
Funny you should ask Michael, because I found this handy dandy picture to help our guests out:
Image Source
Even though the rational side of me was thinking, “really? You need a sign to tell you to put your name on your glass?” The bride inside me was saying, “What a cute sign! I must have this at my wedding!” So cute in fact, that when I came across the sign below, I knew how I would display it as well.
Image via Etsy / Seller AndTheSignSays
I had already procured chalkboard spray paint on one of my many visits to Hobby Lobby, since I just new I was going to need it at some point. I then took my time finding two frames’s that were the right size, as well as having the right look. The black one (which will tell you to take a seat wherever you want), was bought from Hobby Lobby with a 40% off coupon, and the silver one (which will tell you to write your name on your cup), was bought at Michael’s when their frames were on sale. Or maybe I used a coupon, I can’t remember. Either way, it was 40% off as well.
personal photo
While at Michael’s, I also bought enough foam board to fill each of the frames. Luckily enough, nothing had to be engineered together because my two picture frame openings were small enough and required only one board each. I also snagged a chalkboard pen. I wanted to be sure to get one that could easily wipe off in case 1. I messed up either of the signs, and 2. try it out to see if this would work better then regular chalk for the cups (jury is still out, I’ll let you know the outcome when I buy some chalk).
At last, I had all my supplies.
personal photo
After gathering my supplies, I cut the foam board to size for each frame. I then picked a pretty afternoon and sprayed my foam boards.
I don’t have any special insight into spray painting other then read the instructions. However, when it says “spray in a sweeping motion beginning off the surface and continuing off other side”, do it. At first I tried half-assing it and didn’t go all the way off the sides, but doing this created huge blotches on the edges of my foam board. I think one coat would have been ok, but with my first coat creating darker patches on the edges, I went with a second coat to even it out.
personal photo
The last step is going to be figuring out how to attach the foam board to the frame. I tried packing tape, but after a couple hours, it came loose. Another idea I had was a small finishing nail bent over the foam board. I might have to put Michael on that small detail. I’m sure he can come up with something :)
Have you ever started a project, only to realize at the end that you need a little bit of help? Or another visit to the craft store? :/
*Note: If doing a lot of diy’s, your second home will become your local craft store. For a while, I was going every. Single. Weekend. It was ridiculous.
Thursday, April 12, 2012
Mason Jar's & DIY's
When it was first suggested to me to use mason jars as center pieces, I had been reading wedding blogs for a couple months. I quickly scoffed at the idea and said I would not be jumping on that wedding trend train.
Image Source
Oh, how the mighty have fallen. Not only will we be using blue mason jars for centerpieces, but we're also going to be using pint sized jars for drinking glasses.
Image Source / Photographed by Michael Howard
The drinking glasses were actually my first idea (after the initial suggestion) for using mason jars at our wedding. I remembered eating at this restaurant when I was a kid, and I thought it was the coolest thing when they served us our drinks in mason jars. So I figured if I was going to have mason jars at my wedding, I was going to at least use them for what they were originally intended. Drinking moonshine! Just kidding....mostly. Anyways, in our case, we'll be using them for beer! And wine. Ok, ok they can be used to drink nonalcoholic drinks as well. But I don't recommend it. Unless you’re underage, in which case I don’t endorse under-age drinking! Drink some lemonade.
After I had decided to use mason jars for our drinking glasses, my next conundrum was raised when Michael asked, “But how will they know which glass is there’s?”. Well, since you asked Michael...I also found these cute pictures while scouring Etsy.
Image Source / Photographed by BeauxArtPhotographie
Image Source / Photographed by AustinGros
Now, the heart shaped labels weren’t exactly me, but I was pretty sure I had seen the more rustic shaped label at Hobby Lobby. So away I went with my 40% off coupon and managed to pick up this punch for under $10:
Image Source
I also ordered some chalkboard contact paper from Amazon for $8.39:
Image Source
As well as hunted down around 18 dozen pint sized mason jars via Craigslist for $110. Total for all supplies was roughly $128.39 (I don’t remember exactly what I paid for the punch).
After I had gathered all my supplies, I sat in front of the TV and punched 216 of those suckers out. Then, we peeled the backing off, and stuck the adhesive side of the label to 18 dozen mason jars. We broke this step up into a couple Saturday afternoons. Each session didn’t take long, we just got tired of peeling the backing off. And this is what we ended up with!
*personal photo
So cute! I can’t wait to use them for the wedding! Even more exciting, is I’ll get to use these after the wedding for little projects I’ve found on Pinterest! Can’t wait!
Image Source
Image Source
Image Source
Did you start a project for your wedding and realize half way thru that you could use it after the wedding as well?
Subscribe to:
Posts (Atom)