Tuesday, July 31, 2012

Moving


This weekend we went from this two bedroom house located in the concrete jungle of Dallas, Texas:

Pictured here is my parting gift from my friend Crazy in Dallas!  This is our little spicy Burrito.  He was a pinata bought for Cinco de Mayo, then used as a cubicle decoration for my birthday nineteen days later.  I've decided he's my first classroom decoration for when I (fianlly!) manage to get a teaching job.

To this small quaint apartment on the banks of “lake” Dunlap (aka it’s a river that gets a little wider right above the dam):
It will be a little cramped, and we’ll need to adjust to the apartment life after spending over eighteen months in an actual house, but we just have to keep reminding ourselves that this is *fingers crossed* our last apartment home.

We made the drive from Dallas to New Braunfels in pretty good time even with the Budget truck maximum speed staying at 65 mph.  I drove Michael’s truck with the puppy as my only passenger, and Michael towed my 4Runner behind the moving truck.  After we FINALLY made it to the apartments, we ended up sitting and waiting on the maintenance man after trying TWO sets of keys to get into our new apartment.  It turns out the lock on our door was recalled at some point because sometimes it just decides to not unlock, which is what caused the problem for us.  About an hour long problem for us to be exact.

Anyways, we finally got in.  YEAH!!!!  It was hot outside.  Within an hour, the living room of our new apartment looked like this:


By the end of the day, it honestly didn’t look much better.  Michael worked on the bedroom and I worked on the kitchen.  Empty boxes were flying, but I don’t feel like much progress was made until Sunday:


You can at least see a living room starting to take shape.  I had also finished the kitchen, which really helped get rid of some of the boxes that were lying around, taking up valuable space.  On Monday, the cable guy came to hook up the TV’s and internet.  After taking FOUR HOURS to complete the installation, we finally had internet and Olympic Game view ability.  GO TEAM USA!  By Monday night, we not only had walking pathways, but an actual living space in the living room!

 
I know if you’re looking at the above picture, you’re like what?  Really Megan?  There are still boxes and drum set pieces all over the place!  See below for further explanation.

1. Move
2. Return moving truck
3. Cable Installation
4. Move stuff to storage unit

You can tell from the list, we have one more thing to take care of before we can begin to put the finishing touches on the apartment.  We’ve also learned that finding a storage unit around here is a little cut throat, so wish us luck!  Hopefully I can start posting some finished pictures of the apartment instead of the unorganized mess shown above.

Thursday, July 26, 2012

Pictures In A Field: Live Version


A.k.a. I actually took my ideas and did them. 

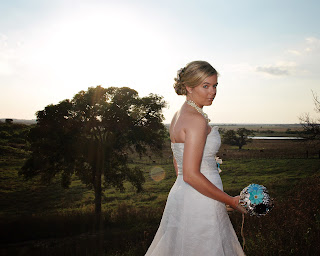
Now that the wedding is over, I can show you some of the awesome pictures from my bridal shoot.  Sounds fancy, right?  Remember the title?  They were in a field….  Filled with cow poop.  Trust me, not all that fancy.

Props included this cool couch taken out of my Papa’s Party House:


Pictured here was my muscle and ride for the day, my Dad and Uncle.  They took care of carrying this couch that weighed a ton, and driving us all around to the different locations.

And this lovely diva, Holly Bay:


She was the best live horse prop a girl could have.  Stood still for the pictures, picked her head up when asked, and didn’t even spook from my dress!  Amazing!  I sound surprised, but like they say (whomever they might be), when working with live animals and kids, you just never know what might happen.

The infamous couch picture.

I think this is Michael’s favorite since he posted it on Facebook.  Apparently I give him this look often.

This picture was taken right before my dad realized there was a water moccasin playing in the creek.  As soon as he yelled “snake!”, I was done with this location.  Anyways, I’ll let the rest of the pictures tell their own stories.


And finally a picture with my boots!  My favorite accessory.

**All pictures courtesy of Dawn's Photography.

Wednesday, July 25, 2012

Burlap Bunting

Image Source

Bunting is a HUGE wedding trend right now.  And we all remember how much I like wedding trends right?  Description words often used when describing weddings that incorporated bunting are “whimsical”, “vintage”, and “playful”.  While I’ve grown accustomed to vintage, and playful is always fun, whimsical is what really throws me off.  Whenever I think of whimsical, I see fairies frolicking in the woods.  Or on a stage: 

Image Source

That is something I was not ok with at our wedding.  Not.  At.  All. *Scary*

However, I have been onboard with burlap bunting signs…..I know it doesn’t seem that different then “whimsical” bunting.  But it is.  I promise.

Image via Etsy 

Image via Etsy

Image via Etsy 

Especially when I added my own special twist, i.e. the Texas shaped spacers like below. 

 
As you can see, I have been hard at work and not hard at sharing.  Well, not really hard at work.  This project was relatively easy, other then the mental anguish of talking myself into pulling out the iron to get this project started.  But I digress.  The supplies that I conveniently had on hand to create the project included burlap, pellon, scissors, triangle pattern, and my trusty sewing machine.  Once again, there are no pictures documenting this project because I SUCK at taking pictures.  Even though I completed this project three different times, each time I managed to forget my camera.  Since I plan on continuing to blog, even now that the wedding is done, I HAVE to get better at taking pictures.

First, I ironed the pellon and burlap together.  The pellon helps keep the burlap from fraying, as well as makes it heavier so that it hangs better.

Next, I traced the triangle pattern on the back of the pellon.  Sketching the triangles like a puzzle helped to optimize the space, as well as creating fewer sides to cut.  This is really helpful as your hand starts to cramp when trying to cut thru 2 thick layers of material.

Finally, I folded the thick edge at the top over, creating a hole to run the twine thru.  Tada!  Burlap bunting!

And now that our wedding is over, I can show you how we displayed some of it.  Saturday, as the finishing touches were put into place around our venue, I received picture updates from Michael, often featuring my brother who was a HUGE help that day, even if he does make an unconventional version of Vanna White.

 (Welcome sign hung from the roof)

(
(Thank You sign behind guest table)

Tuesday, July 24, 2012

Cleaning House

Image Source

Ummm…..maybe not if you know me at all.  More like this:

Image Source

But to a lesser extent.  That’s right folks!  Everything must go!  I love throwing stuff out.  The same way we managed to accumulate all our wedding crap is the same way we’re getting rid of a few odds and ends that have worn out their welcome at our house.

I realize I left you hanging with my last post, but our move is right around the corner (this weekend!) and between the wedding last weekend, and packing everything for the move, I haven’t had a lot of time to share.  We’ve listed a few things on Craig’s List, added a few wedding leftovers to the Weddingbee classifieds, and seen if any friends or family wanted any of the other items that are in good shape.  I’ve created a price list for all the wedding stuff that can be sold, and will start trying to get rid of the bud vases, mason jars, a various other oddities as soon as we move this weekend.  The rest has made a small pile on our living room floor, and it will be making its way to Goodwill or Salvation Army later this week.

We I decided early on that anything that was “upgraded” or replaced with a gift from our registry would also be left behind.  That’s right folks, we’re leaving casualties and we’re not looking back!  Blenders, tea makers, and old bedding will be left behind!  I’ve thrown out numerous pillows that we seem to have accumulated for some unknown reason, clothes and shoes that haven’t been worn in the 6+ month window rule that I strictly enforce, as well as old appliances that somehow have managed to make it this long even though we only paid $6 for them at Wal-Mart (I'm looking at you Toaster Boy).

For people who are minimalists to begin with, and can’t ever seem to find anything to throw out after watching a good episode of Hoarders, we sure have a lot of old junk!  However, after this weekend, we will officially start over (sans old stuff accumulated from college and life before marriage) after moving into our new apartment in New Braunfels, Texas!  After taking my Science 8-12 certification test late August, I’ll start the process of changing my name.  I’ve already started the application process for multiple teaching positions in the area, and hopefully I can start my new job as Mrs. Pierson!

Exciting stuff ahead!  Stay tuned.

Monday, July 23, 2012

Becoming the Pierson's


The other day Michael was making fun of my blog (again, but whatevs) and mentioned how he thought the title didn’t make much sense anymore.  We got married; we ARE the Pierson’s now.  I quickly threw back a smart aleck remark saying, “yeah, well, we’re still working on it.”

I just kind of threw that remark out there, not as some in depth revelation on how our new marriage is going to take hard work and compromise to make it work and blah blah blah.  I just meant it as more of an “it’s a marathon, not a race” comment, and the wedding was just the beginning of these Pierson’s.

I have no intention of abandoning this blog url for another, even after I have finished talking about the wedding.  My reasoning for this is (1) I like for all “my stuff” to be in one place, and this applies to my blog as well and (2) I would like to think that we’re not done becoming the family that we will evolve into.  While we have no immediate plans to add any humans, dogs, or any other type of family member, at some point we will.  We’re going to change.  That’s life.

Basically, this is my explanation for why I’m starting to throw in posts about our day to day lives (moving, job changes) in amongst the wedding diy’s and finishing details.  I’ve honestly found that I like sharing what we’re doing and how we’re doing it with family and friends who aren’t always there to see it on a day to day basis.  I plan on sharing the pro pictures of the wedding, but will also be sharing life’s other details Michael and I are enjoying along the way. 

Which, knowing us, could be anything J

Friday, July 20, 2012

Late Night Jam Sessions


Or as Michael and I have labeled it, my Last Little Bit of Crazy.


Image via OneWed

Image via YoungMarriedChic

See why we’ve called it My Last Little Bit of Crazy? 

I didn’t really have time to talk about it pre-wedding, but I had decided early on that we were going to have little jam favors for our guests at our wedding.  And when I say little, I mean tiny.  The jars I had in mind were less then two ounces.  I had already priced the jars thru multiple websites and decided on the cheapest (but best) route.  I then proceeded to purchase 160 of these bad boys for the 160 place settings I had determined we would need after agonizing deciding on a floor plan.

Image via FillmoreContainer

This project was originally supposed to be something that I would have completed MONTHES before the wedding, but Wedding-itis reared its ugly head during March and April (when I had scheduled to complete this project), and they didn’t get done.  I’m blaming the Wedding-itis on the invitations.  Those suckers wore me out.

Anyways…..back to the beginning of my Master Plan; after googling the crap out of “making jam” and reading various tutorials and Certo Sure Gel instruction sheets, I decided to make a practice batch.  Keep in mind, this all was taking place in January.  Michael and I taste tested a few jars of jam every week for about six weeks to make sure that they tasted good and that I had successfully completed the canning process (i.e. we wouldn’t be giving our guests food poisoning). 

After taste testing and concluding that I had successfully completed my first canning session, I stopped thinking about it.  I mean, I flat out stopped worrying about completing the jam favors at all.  I would even go so far as to give the box of jars a little kick towards the wall whenever I would go into our second bedroom to get some other more important/fun wedding related item.  This procrastination continued thru mid-May. 

With the wedding countdown nearing six weeks, I knew I had to get started.  I eventually completed the 4 batches of 40 jars following the Certo Sure Gel instructions, but also adding an extra pouch of pectin, like the tutorial had advised.  I only boiled the jars for about 8 minutes even though the recipe said 10, but I figured we were ok considering the 1.5 ounce jars we used are about a quarter of the size of the 8 ounce jars used in the tutorial.

Michael helped me design the below label using Avery return address labels and an online tool that was offered by Avery.  They weren’t anything fancy, but we were able to incorporate our monogram (like I had secretly been hoping, but had had no luck on my own perfecting!).


The final “packaging” element that I, in my infinite wisdom, just had to have was a cover for the jar.  And what material do we have in abundance?  Oh yeah!  Burlap!  This was a little trickier due to the combination of inflexible material with a tiny jar.  It wasn’t impossible, just harder then originally thought (Like so many of my other projects!).  I cut the burlap tops and rubber banded them to the jar, and Michael tied the twine and cut any rubber band that was still in sight.  A real team effort!


And voila! (or, as we say here in Texas, wha-la!)  As a side note, our DIY projects were done by Tuesday night, AND a huge weight was lifted off my shoulders! 

P.S. The title to this post (Late Night Jam Sessions) is slightly misleading.  I never stayed up late to complete ANY of my projects, let alone one’s that were completed mere days before the wedding.  Needless to say, no sleep was lost due to wedding worries or diy details. 

Thursday, July 19, 2012

BAM! Married!


Well, we did it!  And it couldn’t have gone any better if you ask me, but then I’m slightly biased.

The weather was great for a Texas summer evening and you couldn’t have asked for anything better.  There were small storm clouds zooming around all evening, but it mercifully didn’t rain all night!  Although, I’m pretty sure there was a lightening storm going off in the distance that kept a few people worried throughout the evening.

It looked AMAZING!  Way better then I had even imagined it would!  Sorry that the only picture I have conveniently located on my phone right now is the above, otherwise this would be a VERY picture heavy post.  Oh well, I guess I’ll have to wait for the professional pictures, as well as my friends pictures, to roll in to share.  Speaking of pictures, I can also share a couple of my favorites from my bridal portraits.  I was against sharing them before in case Michael saw, but now it’s ok.  Especially since, you know, he saw me in the dress this weekend!

Meanwhile, I’ve spent the last 3 days of our "honeymoon" (a.k.a. using up the last of my vacation days before I quit) turning this:


Into this:


In case you can’t tell, that’s our 2nd bedroom full of packed boxes.  That poor 2nd bedroom.  It's been thru a lot this year.  Why, you might ask?

We’re MOVING!  More to come!

Tuesday, July 10, 2012

5 Day Forecast


Looks like we'll be in the low 90's for the high, so by 6 pm we'll probably be in the mid to upper 80's!


At least, that's how it looks like the weather is being predicted today.  We still have about 4 days to go and we all know how fast the weather can change in Texas.

Saturday, July 7, 2012

One Week Left


So, we’re one week from go-time (should that be capitalized? seems more fitting) Go-Time (maybe I’ll even bold it) Go-Time (there, that’s better).

Anyways……(concentrate Megan!)

I’m thinking that my brain has officially left my body.  If it wasn’t for my To Do List that I jotted down last week, I would have nowhere to start.  Whatever gets done by Sunday Wednesday, gets done, and whatever doesn’t, doesn’t.  And I’m not going to worry about it.  Although, my list is attainable.  I’ve accomplished most of my to do’s in an appropriate amount of time, and there’s no reason I shouldn’t be able to finish the rest.

Unless wedding-itis sets in. 

You know, its like Senior-itis in High School, but instead of dealing with your Senior year, you’re dealing with your wedding.  Either way, both events (graduating high school or a wedding) are kind of a big deal, and you don't want the -itis setting in.


After taking a few weeks off though, I think I’ve caught my second wind.  I just need to power thru this weekend and then its smooth sailing.  Or rough sailing.  Either way, next weekend is coming!

*I realize this is a train, and not a sail boat, and that I mixed metaphors, but hopefully you can follow along.  If not, I apologize for the rambling and any confusion it might have caused.

Friday, July 6, 2012

Window Chalkboard


I know, I know, I have a million signs.  Whatevs, I’m going to have one more.  Our guests are going to be very well informed.  Believe it or not, this one was the most interesting (i.e. last minute) sign out of all of them. 

I had procured this window at Canton for a mere $5, thus deeming it the Best Buy out of all my wedding crap.  That’s right, I’m calling it my wedding crap.  I honestly didn’t know what I was going to do with it, but for $5, I couldn’t pass it up.

After a few months, I started thinking I could use it as the drink menu.  I thought it would look really cute leaning against our drink bar, and it would serve to let our guests know what their beverage options would be.  It conveniently has 3 panes, so I figured one for sodas, one for beer, and one for wine.


I have decided to leave its main function as a drink menu, but instead of using glass chalk to write directly on the window pane, I am going to turn it into a chalkboard sign.  I’m still not really sure why I decided to add this last minute diy, but I have.  So here it goes.

Ahhhh.....good old Newt.  Back on topic.
Monday night, I spent an hour covering the wood frame in masking tape, so that when I spray the chalk spray paint, only the glass will be affected.  I also chose to use my brain, and left a few of the ends doubled over, so that the tape can be easily removed at the end of the project.

Last night, I sprayed the glass in a few coats of chalkboard spray paint, letting it dry between coats to make it look even.


And of course, it couldn’t be that easy, so on the 4th of July I had to add a few extra coats because you could still see thru the window in some spots that weren’t covered heavily enough by the spray paint.  After letting it dry some more, I finally was able to rip up the doubled over edges and remove the tape revealing a window chalkboard drink sign! 


Honestly, one of my easiest projects yet.  Nothing had to be re-engineered, re-cut, or frustratingly cried over.  Success!

Thursday, July 5, 2012

10 Day Forecast


That's right folks!  We're close enough for the 10 Day Forecast!  Good news, it doesn't say 100 degrees!  Bad news, it does say 20% chance of rain.  But it is Texas, and its all likely to change.  Keep your fingers crossed!

Summer Essentials


…..as applied to weddings.  Gotcha!

You thought this was going to be an un-wedding related post didn’t you?  I fooled you with my master deceiving skills.

Our wedding is a few short weeks days away (sorry, this was supposed to be posted a while ago, but my work computer's firewall has been against me blogging lately), and you can definitely tell summer is here to stay in Texas.  Gone are the cool nights, short days, and mosquito free evenings.  I personally welcome the sun filled, heat scorching days, but I know that others don’t necessarily share this love with me.  They also don’t necessarily share the heat/sun tolerance with me that I have spent 27 years perfecting.

The first (and at the time, I figured only) option I thought of to aid our people in surviving the 30 minutes spent outside during the ceremony was fan programs:


But as time draws near, and other things start to take precedence, I’m thinking just a simple program would be easier.  We also haven’t met with the Reverend yet (remember, meant to be posted sooner, we have now met with the Reverend) to solidify what would actually go in the program as far as the ceremony and readings are concerned, which means fan programs would end up being a week of diy.  I am trying to avoid the last minute must have details at all costs.

Other thing’s I’ve considered were fans, misters (aka spray bottles), and the combination spray mister fan. 

That’s its technical name. Look it up.

But the practicality and logistics of these ideas comes in to play, and buying 200 of any of the above named things just doesn’t seem like a good idea.  What if I end up with 50 leftover?  How will everybody get one?  Can I put them on each seat since the ceremony seating is amphitheatre style?  Who is actually going to need one?  More than a few of our guests have spent more years then me perfecting their “tolerance” and will be fine. 

Luckily enough, I can avoid all these questions with a simple “Sun Bar” (thank you Pinterest!):

While this isn’t exactly what it will look like (the above is a little “backyard bbq” and we’re going for a more formal look), I’m thinking a plethora of wooden fans, mosquito spray, chapstick, sun screen, spray misters, and whatever else I can find at the Dollar Store will be ideal.  This way guests can choose to use any of the above options, or not choose if they don’t want to, to aid any mosquito, sun, or heat induced issues they might have. 

We will also have drink (alcohol, sodas, and water) readily available to quench their thirst at our drink bar which will be outside between the ceremony and reception area.

I’m hoping this will alleviate any hardships our guests will face by sitting in the sun for our twenty minute reception, but I have a feeling no matter what we do, the sun is going to be a bi@!h and there’s not a lot we can do to fix it.  Oh well. 

I LOVE SUMMER!!!! Woohoo!!!!

Wednesday, July 4, 2012

Framing a P


Somehow, very unintentional on my part, our new monogram has become very prevalent throughout the wedding decor.

Courtesy WeddingChicks

It was originally used in our invitation “packaging” to include our wedding website:


It was added to the utensil tags with a little “Thank You” shout out under it (which I also used on the hostess gifts):

I am still trying to figure out how to incorporate it into our favors, but that’s for a later post.  For another project, we had the monogram screen printed on white material, with the monogram being approximately 16x20 inches in size.  We had asked for two, but were given three because one was considered a “test”.  Luckily for me, I can’t tell the difference between the three of them, so score! Free one!  And I knew immediately what I wanted to use it for. 

Of course I have no pictures of any of the following (world’s worst picture taker, right here!).  I had managed to snag this great white and gold heirloom frame for $20 on one of my scavenger hunts, and I also had some quarter inch Styrofoam board just lying around, which is scary.  (We have a lot of things just “lying around” nowadays, and I can’t wait to throw it all away!  It’s starting to feel like an episode of Hoarders.)  Anyways, back on topic.  We measured and cut the Styrofoam board to fit the opening, laid the P face down on our coffee table, centered the foam board on the back of the P, and then glued the loose edges of the material onto the back of the board with mod podge.

The trickiest part was (1) making sure the monogram was centered on the board and (2) not fighting with each other while trying to make the board fit in the frame.  You see, I had measured the board a little bigger then the frame opening after a previous project was cut too small.  So, when the board didn’t quite fit into the frame on the first try, we had a difference of opinions on how to make it fit.  ANYWAYS, without getting too far into it, above is the great looking finished product and we’re talking to each other again J

We’re going to put the framed P behind the cake on the cake table to distract from this framed quilt our venue has hung on the wall.  It was kind of a last minute diy, but I love the way it turned out, and the fact that it’s going to cover up (at least partially) that awful, doesn’t match anything, quilt, makes it look even better in my eyes.

Winning!